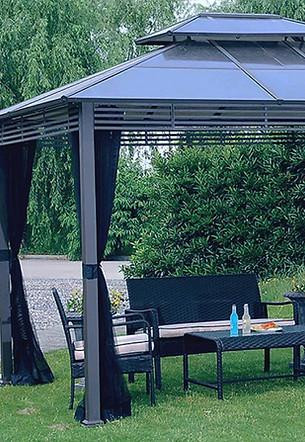
The Ultimate Guide to Pergola Installation
Adding a pergola to your outdoor space is a great way to enhance its beauty and functionality. Whether you’re looking for a shaded area to relax or a stylish focal point for your garden, a pergola can provide the perfect solution. This guide will walk you through the pergola installation process, ensuring your project is a success.
Planning Your Pergola Installation
The first step in pergola installation is careful planning. Begin by deciding on the location and size of your pergola. Consider factors such as sun exposure, proximity to your house, and available space. It’s essential to measure the area accurately to ensure your pergola fits perfectly.
Choosing the Right Materials
Selecting the right materials is crucial for a successful pergola install. Common materials include wood, vinyl, and metal. Wood pergolas offer a natural, classic look but require regular maintenance. Vinyl pergolas are low-maintenance and durable, while metal pergolas provide a modern, sleek appearance. Choose a material that complements your home’s style and suits your maintenance preferences.
Gathering Tools and Supplies
Before you begin, gather all the necessary tools and supplies. You’ll need:
- Measuring tape
- Level
- Post hole digger
- Concrete mix
- Screws and brackets
- Drill
- Ladder
Having everything ready will make the pergola installation process smoother and more efficient.
Preparing the Site
Start by marking the pergola’s footprint on the ground. Use stakes and string to outline the area. Next, dig holes for the posts using a post hole digger. The depth of the holes will depend on the height of your pergola and local building codes. Typically, holes should be at least 2 feet deep. Pour concrete into the holes and set the posts, ensuring they are level and plumb. Allow the concrete to cure for at least 24 hours before proceeding.
Assembling the Pergola
Once the posts are securely in place, it’s time to assemble the rest of the pergola. Begin by attaching the beams to the posts using brackets and screws. Make sure the beams are level and spaced evenly. Next, add the rafters, securing them to the beams with screws. For added stability, you can use additional brackets or braces.
Finishing Touches
With the main structure complete, you can add any finishing touches to personalize your pergola. Consider adding a lattice for extra shade, climbing plants for a touch of greenery, or outdoor lighting for ambiance. These details will enhance the overall look and functionality of your pergola.
Conclusion
Pergola installation is a rewarding project that can transform your outdoor space into a stylish and functional retreat. By following these steps and carefully planning your pergola install, you can create a beautiful addition to your home that you’ll enjoy for years to come. Whether you’re a seasoned DIY enthusiast or a first-time builder, this guide will help you achieve a successful pergola installation.

Comments
Post a Comment